Dorie’s World Peace Cookies
Updated April 28, 2011
I am ashamed to say that this is the first time I have baked Dorie’s Korova or “World Peace Cookies.” I have read the recipe hundreds of times and drooled over many blog posts about these famous cookies, but I never made them. Sad!
These cookies made their debut in “Paris Sweets: Great Desserts from the City’s Best Pastry Shops” by Dorie Greenspan. Dorie reprinted the recipe in “Baking: From My Home to Yours”, but with a different name: World Peace Cookies. Dorie’s neighbor gave them their new name. He once said that “a daily dose of
After taking one bite, I agree!
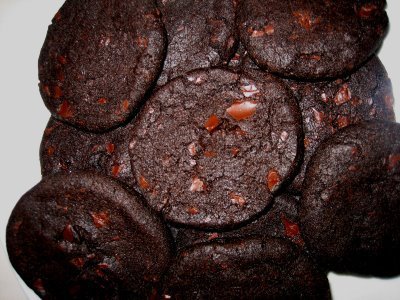
These cookies are loaded with chocolate…cocoa powder and bittersweet chocolate chunks. The texture is also amazing. I usually prefer a soft cookie, but these are crisp, close to the texture of a sable, but they still manage to melt in your mouth. And now for the secret ingredient, fleur de sel or fine sea salt. In every bite you get a kick of salt! Genius! It is the perfect combination of sweet and salty. These chocolaty delicious discs will not disappoint you! Can they bring World Peace? You decide…our kitchen was pretty darn happy! Josh said they are the perfect cookie for dipping in a tall glass of milk. So make sure you have some in the fridge!
You can find the recipe in Dorie’s books, Paris Sweets and Baking from My Home to Yours. I have them both.They are excellent! Why wouldn’t you want to buy a book that has the answer for World Peace?
Since I am full of love, kindness, and peace after eating a batch of these cookies. I will share the recipe:) ENJOY!!
World Peace Cookies
Source: Baking From My Home to Yours, Dorie Greenspan
– makes about 36 cookies –
Ingredients
1 ¼ cups all-purpose flour
⅓ cup unsweetened cocoa powder
½ teaspoon baking soda
1 stick plus 3 tablespoons (11 tablespoons) unsalted butter, at room temperature
2/3 cup (packed) light brown sugar
¼ cup sugar
½ teaspoon fleur de sel or ¼ teaspoon fine sea salt
1 teaspoon pure vanilla extract
5 ounces bittersweet chocolate, chopped into chips, or a generous ⅓ cup storebought mini chocolate chips
Procedure
1. Sift the flour, cocoa and baking soda together.
2. Working with a stand mixer, preferably fitted with a paddle attachment, or with a hand mixer in a large bowl, beat the butter on medium speed until soft and creamy. Add both sugars, the salt and vanilla extract and beat for 2 minutes more.
3. Turn off’ the mixer. Pour in the dry ingredients, drape a kitchen towel over the stand mixer to protect yourself and your kitchen from flying flour and pulse the mixer at low speed about 5 times, a second or two each time. Take a peek-if there is still a lot of flour on the surface of the dough, pulse a couple of times more; if not, remove the towel. Continuing at low speed, mix for about 30 seconds more, just until the flour disappears into the dough-for the best texture, work the dough as little as possible once the flour is added, and don’t be concerned if the dough looks a little crumbly. Toss in the chocolate pieces and mix only to incorporate.
4. Turn the dough out onto a work surface, gather it together and divide it in half. Working with one half at a time, shape the dough into logs that are 1 ½ inches in diameter. Wrap the logs in plastic wrap and refrigerate them for at least 3 hours. (The dough can be refrigerated for up to 3 days or frozen for up to 2 months. If you’ve frozen the dough, you needn’t defrost it before baking—just slice the logs into cookies and bake the cookies 1 minute longer.)
5. GETTING READY TO BAKE: Center a rack in the oven and preheat the oven to 325 degrees F. Line two baking sheets with parchment or silicone mats.
6. Using a sharp thin knife, slice the logs into rounds that are ½ inch thick. (The rounds are likely to crack as you’re cutting them—don’t be concerned, just squeeze the bits back onto each cookie.) Arrange the rounds on the baking sheets, leaving about 1 inch between them.
7. Bake the cookies one sheet at a time for 12 minutes—they won’t look done, nor will they be firm, but that’s just the way they should be. Transfer the baking sheet to a cooling rack and let the cookies rest until they are only just warm, at which point you can serve them or let them reach room temperature.
STORING: Packed airtight, the cookies will keep at room temperature for up to 3 days; they can be frozen for up to 2 months.
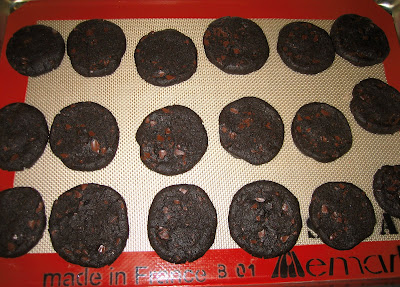
** The cookies will crack and crumble a little…don’t worry, even Dorie said this would happen. Just put them back together and bake! I think I baked mine for 10 mins. Just watch them, they won’t be completely set when you take them out! **


I agree with Josh. Those are the perfect cookie to dip in milk. That sure are yummy. Glad that you enjoyed them.
Mmmm those look really tasty. Why are they called World Peace Cookies?
So glad you finally made these! They’re delicious!
ohhhh they look yummy. i’m guaranteed to drool over some yummy food every time i come to your blog… 🙂
I think I have to make these very soon…they sound so good! Thanks for sharing the recipe!
I loved those cookies, mmm…they were so good. I am happy that I was able to see you guys. Sad though that I didn’t get to so you more! I called you on Sunday, but you guys must have been busy. Keep in touch!!
These are among my all-time favorite cookies, so I’m really glad you finally got around to baking them — and even gladder that you and Josh liked them.
Can’t wait to try these yummy sounding cookies! Every recipe that Maria has posted, and that I have made, are the bestest!
I love you blog — these are gret cookies. a version is the base for my Baked Alaska you can see it at: http://www.pastrychefbyfire.com/2008/07/lesons-learned-meringue.html
btw, you had the sweetest wedding buffet i have seen in a long time.
I have been so wanting to try these, They are seriously calling my name.